This is a sponsored conversation written by me on behalf of Cricut. The opinions and text are all mine.
Travel pictures, recipes, love notes, anything sentimental, keep them all bound together in a memory book made with the New Cricut Maker Tools.

This post contains affiliate links which means I make a little something when you purchase through the link with no extra cost to you.
Are you a sentimental person? At our house, we love to keep photos, cards, letters and other things in little books around the house. It’s fun to look back on memories or letters and remember those good times.
Recently I went to girls camp and I was in charge of cooking for the 150 people attending the camp. I had a really amazing kitchen crew to help me with all the prep, serving and cleaning. We had some really good meals, and everyone contributed a recipe or two to our menu.
As a thank you to the crew, I wanted to make them some sort of memory book. Since I was really bad at taking pictures, due to the fact that we were super busy, I thought a recipe book of all our camp favorites would be so fun. I used the idea of a memory book, and turned it into this fun cookbook to give to all the members of the team.
New Cricut Maker Tools
As I was gathering supplies to create my cookbook memory book, I grabbed the New Cricut Maker Tools and thought it would be fun to use them for this project.
One of my favorite things about the Cricut Maker is not only the ability it has to cut so many types of materials, but all the cool cutting tools that are available to use with the machine. The first set of cutting tools were the fine point blade (used for almost everything), the rotary blade (used for cutting fabric), and the knife blade (used for cutting wood).
Recently Cricut brought out a whole new set of new tools. The new tools will allow you to engrave, deboss, cut wavy edged projects, and perforate.
The engrave tool allows you to engrave amazing designs on a variety of materials like metal, aluminum, and plastic. The perforation blade allows you to create the perfect quick tear cuts for any shape and design.
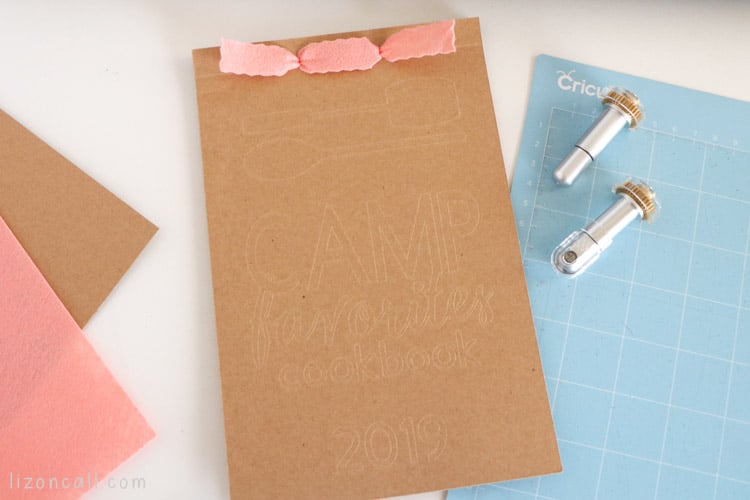
For this project I used the wavy blade to cut a wavy edge “ribbon” out of a piece of felt. Using the wavy blade gets you a decorative edge for any project created from a variety of materials. I used the fine deboss tool to create a fun cover for the cookbook. The fine debossing tip lets you add a nice dimensional look to your projects.
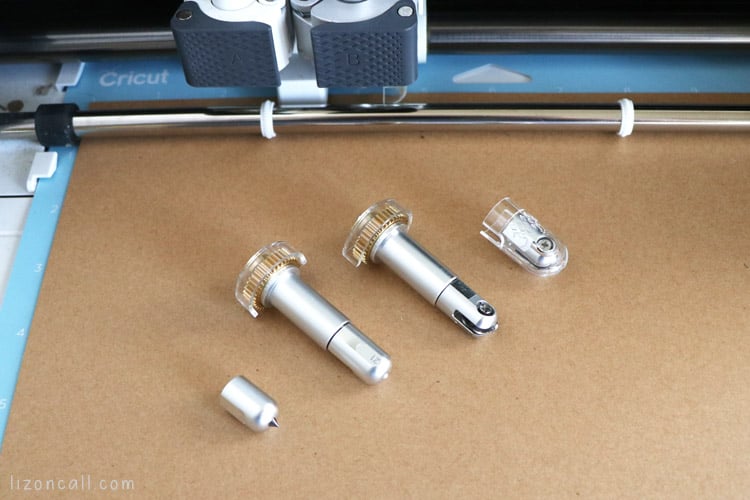
One of my favorite features of the new Cricut Maker Tools is the quick swap housing system. Once you buy one housing, you just need to buy the tips and swap them out when you’re ready to use them. The quick swap housing has a little button on the top that releases the tip, making switching out the cutting tools super easy.

For this camp favorites memory book, you will need the following supplies.
New Cricut Maker Tools
Camp Favorite Cookbook Project
How to Make a Memory Book with Cricut Maker Tools
Click on the camp favorite cookbook project link above and when it opens in Design Space, click on customize. Here is where you will be able to change what the front of your memory book will say. Just type in the text boxes what you want on the cover of your book. Make sure to group the entire together and then click attach at the bottom of the layers panel. You could even make the edges of the rectangle covers with a wavy edge. Just change the line type in the top menu bar for those layers.
Click make it and on the mat screen, you will see if you have all the layers attached and that the debossing will be done on the front cover of your book. If all looks good, click the continue button and select the Cricut maker machine.
Select the material you will be cutting first and insert the correct tool for the project to get started. It will depend on what the machine will cut first. Add the wavy blade for cutting the felt ribbon. Then switch out the blade as instructed in Design Space to deboss, score and cut the kraft board.


Once the pieces are all cut with the Cricut Maker, gather the items to go inside your memory book. I printed these recipes out on regular printer paper and trimmed them down to a 5 x 7.5 size to fit perfectly in the book.

Line up all the pieces so they fit exactly where you want. Measure about two inches from each side of the cover and make a mark to punch 2 holes.

Feed the felt ribbon through the front holes to the back cover. Cross them in the back of the book and feed them through opposite holes to the front to secure.

And then your memory book is done! I can’t wait to pass these out to my kitchen crew.
I just love the versatility of this project. There are so many options!
So what kind of memory books are you thinking of making?
Happy Crafting!
Liz


Leave A Reply!